How to Center Clay: The Full-Body Move That Beginners Get Wrong
Every beginner at the pottery wheel wants to know when the centering will click. The honest answer is: after a lot of tries, and usually suddenly, when something you weren't quite doing right shifts into place and the clay stops fighting you. What shifts is almost always the same thing: you stop relying on hand strength and start using your body.
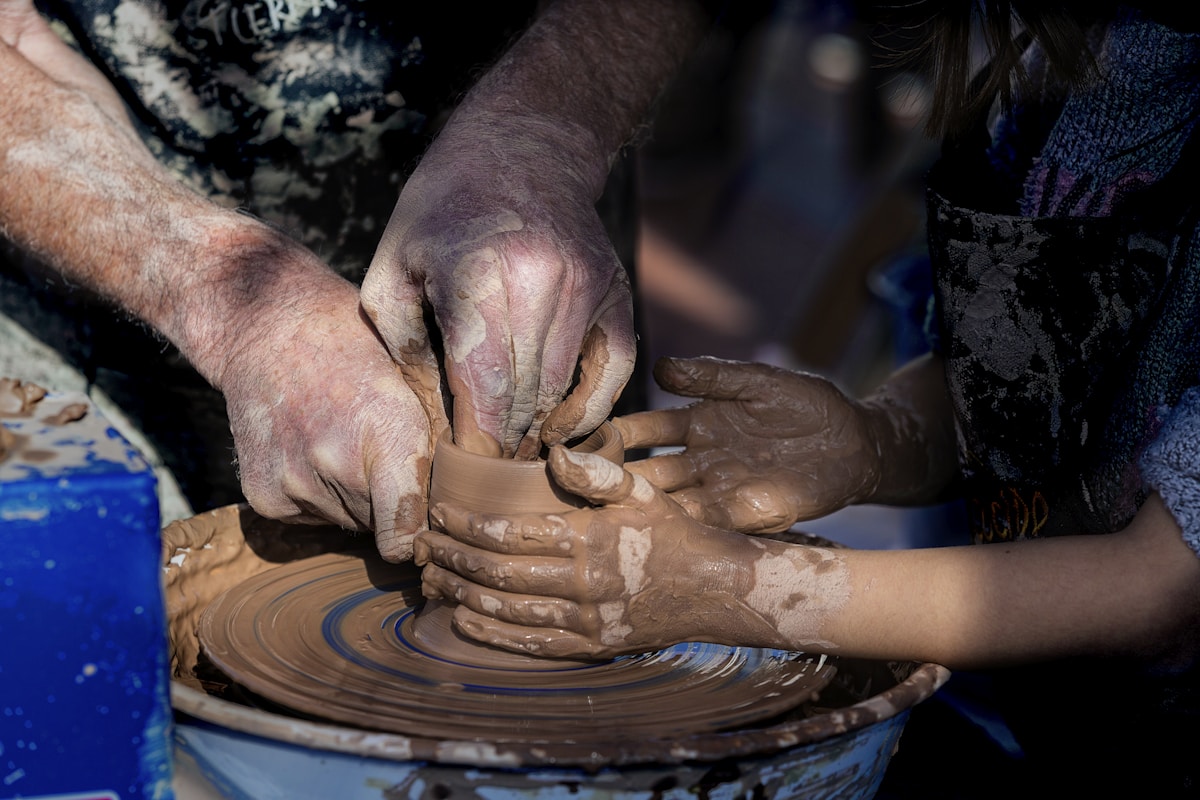
Centering is the process of getting a spinning lump of clay into a symmetrical, balanced state so that when you open it and pull up the walls, they rise evenly without wobbling. Uncentered clay is one of the more unnerving physical sensations in craft — a rhythmic thump through your hands that tells you the mass is going somewhere you're not. Centered clay has a stillness to it that you can feel as much as see. Learning to get there consistently is what the first months at the wheel are mostly about.
Setting Up
Start with clay that's soft enough to work but not sticky-wet — it should feel like firm butter rather than bread dough. Cold, hard clay resists centering and exhausts your hands; clay that's too soft collapses under pressure. Most throwing clays are fine straight from the bag in a warm studio. If yours has been sitting somewhere cold, wedge it and let it rest.
Wedge the clay thoroughly before you start. Proper wedging removes air bubbles and creates even consistency throughout the piece — both important when you're pushing hard during centering. A lump with a hard spot or a pocket of air will resist centering in ways that feel identical to poor technique, which is frustrating.
Slam the wedged clay firmly onto the center of the wheel head and wet your hands. The wheel should be spinning at medium-high speed — faster than you'll use for opening and pulling, because more speed helps centering.
Modernhaus documents studio pottery from wheel to kiln.
Explore the Clay Studio →The Cone Up, Cone Down Method
The classic teaching sequence starts with coning. With the wheel spinning, wet the clay and form a loose cone shape — push upward with both hands cupped around the base, letting the clay rise. Then push it back down: place one palm flat on top of the cone and press firmly downward while your other hand steadies the side, resisting outward movement. Up and down, three or four times.
Coning does two things: it further aligns the clay particles (making the clay more plastic and workable), and it starts the process of getting the mass moving symmetrically. After a few cones, the clay will be warming up and responding more willingly.
The Actual Centering Push
Now the key move. With the wheel spinning, place your dominant hand against the side of the clay with your palm facing inward, fingers pointing down. Brace your elbow firmly against your hip or thigh — not floating in the air, but locked against your body. Place your other hand on top of the clay, fingers pointing toward the back of the wheel.
Lean in. Use your body weight to push through the braced arm into the clay. The force should come from your core and your leaning weight, not from muscling with your hand. The top hand presses gently downward to prevent the clay from rising as you push in from the side.
The bracing is the thing most beginners miss. If your arms aren't locked against your body, your muscles are doing all the work, and they'll tire quickly. Locked and braced, you can push for much longer and with much more consistent pressure — and consistent pressure is what centers clay.
Hold the push steady for a full rotation or two, then release. Look at the clay. If it's still wobbling, the high spot is wherever the lump moves toward your hands; push a little more there specifically.
Reading the Clay
You know the clay is centered when it stops pulsing in your hands. There's a point — and you'll feel it before you see it clearly — where the motion smooths out and the clay seems to still, even though the wheel is spinning. From above, the top surface should look like a still pool rather than a wobbling mass.
One useful check: hold a fingertip lightly against the side of the clay. If you feel a regular bump, bump, bump, it's not centered. If you feel continuous smooth resistance, it is. Some potters barely look at the clay during centering and rely entirely on feel.
Common Mistakes
Hands that drift outward rather than staying in contact. Too much water — the clay gets slippery and your hands slide rather than grip. Arms floating rather than braced. Wheel speed too low. Clay that was too cold to start.
The most common of all: trying too hard with the hands and not enough with the body. Centering with hand strength works until it doesn't — usually around 800 grams of clay, above which hand strength alone becomes exhausting. Learning to throw larger pieces eventually forces the body-weight technique anyway. Starting with it from the beginning saves a lot of frustration.
Once centering feels easy, everything else at the wheel gets easier too — not because the other skills are simpler, but because centering is the foundation and a shaky foundation makes everything built on top of it harder. The potters who make it look effortless have centered several thousand lumps of clay. At some point it becomes as natural as walking. Getting there just requires time at the wheel.