The Natural Dyer's Toolkit: Why Your Pot Choice Affects Color
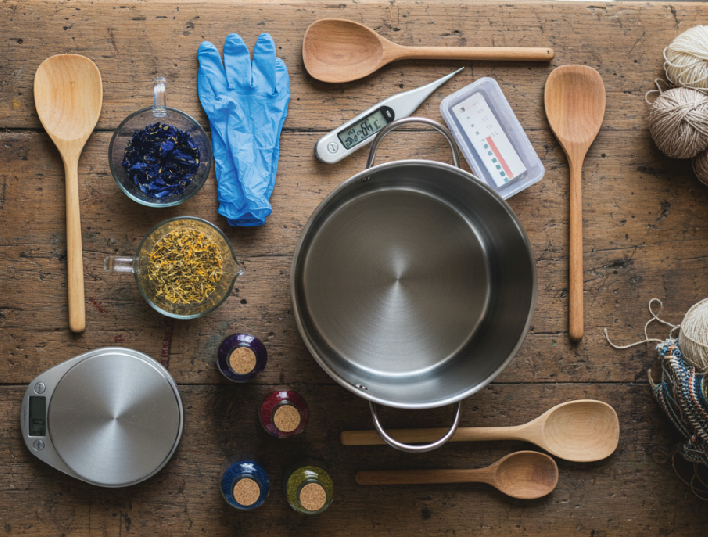
The equipment matters.
Use aluminum pots, and you're accidentally mordanting with aluminum. Use iron pots, and everything shifts darker. Natural dyeing requires materials that won't interfere with the chemistry - or tools dedicated solely to dyeing that will never be used for cooking again.
The distinction is important. Some mordants are toxic enough that you don't want them anywhere near food preparation. Once a pot has held copper sulfate or iron mordant, it's a dye pot forever.
Here's what natural dyeing actually requires, why each piece matters, and what to avoid.
Dye Pots: Why Material Composition Determines Everything
The pot you use affects the color you get.
Stainless steel is the standard for natural dyeing. It's non-reactive - it won't add metal ions to your dye bath or interact with mordants. What you put in the pot is what you get. No accidental color shifts from the vessel itself.
Stainless steel is also durable. It handles repeated heating and cooling without warping or degrading. It resists staining from plant materials (though some dyes will discolor the interior over time - this is cosmetic, not chemical).
Size matters. A four-gallon pot handles about a pound of fiber with adequate water for dye bath movement. Smaller pots work for samples or small projects. Larger pots (8-10 gallons) accommodate multiple pounds of fiber for production dyeing.
Enamel pots work for dyeing if the enamel coating is intact. Chipped enamel exposes the metal underneath - usually iron or aluminum - which then reacts with the dye. A chipped enamel pot becomes an iron-mordant pot unintentionally.
Aluminum pots mordant with aluminum. Everything dyed in an aluminum pot is essentially getting alum mordant whether you intended it or not. Some dyers use this deliberately. Most prefer to control mordanting separately and use non-reactive vessels.
Iron pots shift all colors darker and grayer. Cast iron has been used historically for this exact purpose - creating dark, muted colors through iron interaction. But for controlled color work, iron pots introduce variables you didn't choose.
Copper pots shift colors toward green and blue-green. Again, useful if that's the goal, problematic if you wanted the straight dye color.
The vessel is part of the chemistry. Choose materials that either don't react (stainless steel) or react predictably (copper/iron if you want their color-shifting effects).
Heat Sources: Controlling Temperature
Natural dyeing requires sustained heat, often for extended periods.
Stovetops work for small-batch dyeing. Electric or gas both function. The challenge is maintaining steady temperature - you're monitoring and adjusting constantly. Stovetops also tie up kitchen equipment for hours.
Outdoor propane burners solve the kitchen occupation problem and provide high heat for large pots. They're common for production dyeing or indigo vat maintenance where you need to heat substantial volumes. Wind affects burner efficiency - some setup provides wind protection.
Electric hotplates offer temperature control without open flame. Useful for workshops or indoor spaces where propane isn't practical. They're generally limited to smaller pot sizes unless you invest in high-wattage commercial units.
Slow cookers work for very small-batch dyeing and sample testing. The low, steady heat is actually ideal for dyeing. Size limitation is the constraint.
Whatever heat source you use, temperature control matters. Most natural dyeing happens between 180-200°F (82-93°C) - hot enough to extract color and bond dye, not so hot that you risk scorching. A simmer, not a rolling boil.
Thermometers: Monitoring Heat
Temperature affects extraction rate, dye uptake, and fiber safety.
Instant-read thermometers work but require constant checking. You're pulling them in and out of the dye pot repeatedly.
Dial thermometers that clip to pot edges provide continuous monitoring. The probe stays in the liquid, the dial sits above the pot rim where you can see it. More convenient for extended dyeing sessions.
Digital probe thermometers with remote displays let you monitor temperature from across the room. Useful for maintaining specific temperatures without hovering over the pot.
Accuracy matters less than consistency. If your thermometer reads slightly high or low but reads consistently, you can adjust for it. What you need to know is "am I at simmering temperature" and "has temperature dropped below dyeing range."
Some dyes extract better at specific temperatures. Others are less particular. Indigo vats need relatively narrow temperature ranges (80-110°F). Most plant dye extraction tolerates wider ranges.
pH Testing: Critical for Indigo, Useful for Everything Else
pH affects dye chemistry.
pH strips are inexpensive and sufficient for most natural dyeing. They give you a range (pH 6-8, pH 9-11) which is adequate information. You're not doing laboratory chemistry - you just need to know "is this acidic, neutral, or alkaline."
pH meters provide precise readings but require calibration and maintenance. Overkill for casual dyeing, useful for production work or scientific documentation.
For indigo dyeing, pH monitoring is essential. Indigo vats need alkaline conditions (pH 10-11) to keep leucoindigo soluble. As the vat works, pH drops. You test regularly and adjust with alkali (soda ash, lye) to maintain function.
For other natural dyes, pH is less critical but still relevant. Acidic conditions shift some dyes toward warmer tones, alkaline conditions toward cooler tones. Testing lets you manipulate and reproduce color shifts.
Water pH also matters. If your tap water is particularly acidic or alkaline, it affects dye bath chemistry. Testing baseline water pH explains some color variation between batches.
Stirring Tools: Wood vs. Stainless Steel
You need something to move fiber through the dye bath and lift it out.
Wooden spoons or dowels are traditional. Wood doesn't react with dyes and handles heat well. Some woods (tannin-rich species like oak) can contribute tannins to the dye bath, which affects cellulose fiber dyeing. Hardwoods generally cause fewer issues than softwoods.
Wooden tools stain permanently from dyes. This is cosmetic - the staining doesn't affect future dye baths - but your stirring tools will be tie-dyed in whatever colors you've worked with.
Stainless steel spoons or tongs don't stain and are easy to clean. They heat up more than wood (hot steel can burn you or scorch fiber if you're not careful). But they're non-reactive and durable.
Glass rods work for small-batch dyeing. They don't react, don't stain, easy to clean. Fragile compared to metal or wood.
Whatever material you use, dedicate dyeing tools to dyeing only. Don't use your dye pot stirring spoon for cooking later. Mordants residue, dye residue - you don't want any of that migrating to food.
Straining Equipment: Removing Plant Material
After dye extraction, you need to remove plant matter from the dye liquid.
Fine-mesh strainers catch most plant material. You pour the hot dye bath through the strainer into another container. The liquid goes through, the plant matter stays behind.
Cheesecloth provides finer filtration if needed. Some dyes (like indigo) benefit from very clear dye baths. Multiple layers of cheesecloth filter out fine particles.
Paint strainer bags (fine nylon mesh bags sold for straining paint) work excellently for dyeing. They're reusable, handle heat, and filter to a fine level. Hardware store item repurposed for dyeing.
The goal is clear dye liquid. Plant matter left in the bath can cause uneven dyeing - particles stick to fiber and create spots. It also makes it harder to assess dye bath exhaustion visually.
Storage Containers: Keeping Dye Materials Organized
Natural dyeing involves numerous powders, liquids, and plant materials.
Glass jars with tight lids store dried plant materials and dye powders. Glass is non-reactive, transparent (you can see contents), and keeps moisture out. Label everything clearly - dried plant materials can look similar.
Plastic storage containers work for less-critical materials. Avoid storing mordants in plastic long-term - some mordants can react with plastic over time. Glass is safer.
Measuring containers in various sizes help portion out mordants and dyes. Dedicated measuring cups that never touch food. Clear markings for accurate measurement.
Organization prevents mistakes. Mordants and dyes often come as similar-looking powders. Clear labeling and separate storage areas for mordants vs. dyes vs. plant materials reduces the chance of grabbing the wrong substance.
Scales: Measuring Fiber and Materials
Natural dyeing works on ratios - percent of mordant by weight of fiber, ratio of dye material to fiber weight.
Kitchen scales sufficient for most dyeing. You need capacity for at least five pounds (to weigh wet fiber) and accuracy to at least 5 grams (for measuring mordants).
Digital scales are easier to read than mechanical scales. Tare function (zeroing out container weight) is essential - you're weighing materials in containers, not loose.
Accuracy matters more for mordants than dyes. Mordant too little, and dye won't bond completely. Mordant too much, and fiber can become damaged or sticky. Dye amount affects intensity but is more forgiving - you can adjust in subsequent dye baths.
Fiber should be weighed dry for ratio calculations, even though you'll be dyeing it wet. A pound of dry wool weighs roughly two pounds when saturated with water. The dye recipe is based on dry weight.
Safety Equipment: Protecting Yourself
Some mordants require safety precautions.
Gloves protect hands from mordants, hot water, and dye staining. Nitrile gloves work well - they're chemical-resistant and heat-tolerant. Some dyers prefer longer gloves that cover forearms when reaching into deep pots.
Dust masks for handling powdered dyes and mordants prevent inhalation. Not all natural dye materials are benign in powder form. Breathing protection is basic safety.
Eye protection for mixing concentrated mordants or working with alkaline indigo vats. Chemical safety glasses if you're handling corrosive materials like lye.
Aprons protect clothing. Natural dyes stain. Most dyers wear dedicated dyeing clothes that they don't care about staining, but an apron provides additional protection.
The level of safety equipment depends on what you're working with. Alum mordanting with onion skins? Gloves are sufficient. Mixing indigo vat with lye and handling copper sulfate? Full protective equipment.
Workspace Considerations: Where Dyeing Happens
Natural dyeing is messy and requires space.
Ventilation matters when heating dye baths. Some plant materials smell strongly when simmered. Indigo fermentation vats have distinctive (strong) odor. Outdoor work or well-ventilated indoor spaces make dyeing more tolerable.
Water access is essential. You're filling pots, rinsing fiber, cleaning equipment. Easy access to water - ideally hot water - makes the process less laborious.
Heat-safe surfaces for placing hot pots. Trivets, heat-resistant mats, or outdoor tables that can handle heat and spills.
Stain-tolerant surfaces because dye spills. Stainless steel tables, concrete floors, outdoor spaces - surfaces that either don't stain or where staining doesn't matter.
Some dyers set up dedicated outdoor dyeing stations. Others use basements or garages. Kitchen dyeing works but requires careful management - you're heating large pots of colored liquid that can splash, spill, and stain everything nearby.
Drying Equipment: After the Dye Bath
Once fiber is dyed, it needs to dry.
Drying racks provide airflow around wet fiber. Wooden or PVC pipe racks work. The goal is air circulation on all sides so fiber dries evenly.
Clotheslines outdoors work well if weather permits. UV exposure fades some natural dyes, so shade drying is preferable for long-term color retention. But initial drying in sun is often fine.
Towels for pressing excess water from fiber before hanging. Don't wring - wringing can felt wool or distort fabric. Press between towels to remove water.
Proper drying prevents mildew and uneven color. Fiber piled wet while drying can develop dark spots or even mold if it sits too long.
Record-Keeping Tools: Documenting Results
Natural dyeing is variable. Documenting what you did and what resulted makes it possible to reproduce successes and avoid failures.
Notebooks for recording dye source, mordant type and amount, fiber weight, temperature, time, and resulting color. Some dyers photograph samples and tape them into notebooks alongside notes.
Sample cards showing actual dyed fiber with notes about process. Physical samples are more accurate than written color descriptions.
Labels for dyed fiber noting what dye and mordant were used. Months later, you won't remember which skein was madder with alum versus madder with iron.
The documentation doesn't need to be elaborate. Basic information - what materials, what amounts, what result - is sufficient to reproduce or troubleshoot.
Optional Equipment: For Specific Techniques
Some dyeing methods require specialized tools.
For indigo: Vat containers (plastic buckets or barrels), pH testing supplies, reducing agents, alkali, sometimes fermentation materials. Indigo dyeing is its own category with specific equipment needs.
For shibori/resist work: Thread, rubber bands, clamps, poles, sewing supplies. Resist dyeing adds pattern-creation tools to the basic dyeing setup.
For solar dyeing: Glass jars, sun exposure. Solar dyeing uses passive heat from sun rather than stovetop heat. Simpler setup, slower process.
For bundle dyeing: Fabric for bundles, string for tying, sometimes metal sheets for contact. Bundle dyeing wraps plant materials directly against fiber and steams or simmers the whole package.
These specialized techniques expand what's possible but aren't necessary for basic natural dyeing.
What You Don't Need
Natural dyeing doesn't require expensive or specialized equipment for basic work.
You don't need laboratory glassware. Kitchen and hardware store items work fine.
You don't need elaborate heating systems. A stovetop or hotplate suffices for small-batch work.
You don't need exotic tools. The fundamentals - pot, heat, thermometer, stirring implement, strainer - cover most natural dyeing.
The barrier to entry is low. Most of the required equipment is either already in your kitchen (and can be repurposed to dedicated dye equipment) or available inexpensively from restaurant supply or hardware stores.
Where cost accumulates is in quality. Better stainless steel pots last longer. Accurate scales make mordanting more consistent. Proper safety equipment protects you. But the minimum viable setup is quite minimal.
Dedicated Equipment vs. Dual-Use
The critical decision: dedicated dyeing equipment that never touches food, or careful equipment that could theoretically be cleaned and used for food.
The safe answer: Dedicate dyeing equipment. Once pots have held mordants or strong dyes, treat them as permanently contaminated for food purposes. Some mordants - copper sulfate, iron sulfate - are toxic. You don't want residue anywhere near food.
The practical reality: Many dyers start with old kitchen equipment they were going to discard anyway. Thrift store finds. Hand-me-down pots. This is fine as long as those items become dye-only items from that point forward.
Mark dyeing equipment clearly. Tape, paint, labels - something that prevents accidental use for cooking. Store dyeing equipment separately from kitchen equipment if possible.
The investment in dedicated equipment is small compared to the risk of contamination.
Equipment Maintenance and Cleaning
Dye pots need regular cleaning to prevent buildup.
Basic cleaning: Hot water and dish soap after each use. Scrub out any plant material or dye residue. Rinse thoroughly.
Deep cleaning: Bar Keeper's Friend or similar cleaner removes staining and buildup from stainless steel. This is cosmetic - the staining doesn't affect future dye baths - but it makes it easier to assess dye bath color and exhaustion.
Avoiding contamination between dyes: If you're switching from one dye to a very different one, thorough cleaning prevents color carryover. A pot that held logwood (purple-black) will tint the next dye bath slightly purple if not cleaned completely.
Checking for damage: Inspect pots regularly for warping, cracks, or degrading. Damaged equipment affects temperature control and can leak.
Wooden tools need periodic replacement. They eventually splinter or crack from repeated heating and drying cycles.
Scaling Up: From Samples to Production
The equipment needs change with scale.
Sample dyeing (less than 100 grams fiber): Small pots (2-4 quart), kitchen stovetop, basic safety equipment. Everything fits on a counter.
Small batch dyeing (100-500 grams fiber): Medium pots (4-8 quart), dedicated stovetop or hotplate, full safety equipment. This is typical hobbyist scale.
Production dyeing (1+ pounds fiber per batch): Large pots (4-10 gallon), outdoor burners or commercial heating elements, substantial workspace, full safety setup. This is professional or serious amateur scale.
Each scale up requires more equipment investment, more space, and more attention to safety and ventilation. But the fundamentals remain the same - heat, water, non-reactive vessels, measurement tools.
Improvisation and Substitution
Natural dyers improvise constantly.
Can't find stainless steel pots? Enamel canning pots work if unchipped.
No pH strips? You can tell indigo vat health by color and smell, though pH testing is more precise.
No fancy drying rack? Plastic hangers on a clothesline.
No dedicated measuring cups? Mark permanent measurements on dedicated containers with paint pen.
The craft accommodates improvisation. Understanding what each piece of equipment actually does - why stainless steel matters, why temperature control matters - lets you substitute intelligently when needed.
Building a Kit Over Time
Most dyers don't buy everything at once.
Start minimal: one stainless steel pot, one heat source, basic safety equipment (gloves, mask), measuring tools. Dye with kitchen materials (onion skins, avocado), use alum mordant (widely available, relatively safe).
Add as you expand: larger pots as you work with more fiber, pH testing when you start indigo work, additional mordants as you explore color ranges, specialized tools for resist techniques.
The equipment grows with the practice. You discover what you actually use versus what sounded useful but sits unused. Your workspace setup evolves based on what works for your specific situation.
There's no single correct natural dyeing setup. The equipment serves the work. What you need depends on what you're making, how much you're making, and where you're making it.
What Makes Equipment "Good Enough"
The standard isn't perfection - it's functionality and safety.
Good enough pots: Non-reactive material, adequate size for your fiber quantities, intact (no warping or cracks that cause leaks).
Good enough heat source: Can maintain steady temperature in the range you need, works in your available space, doesn't create safety hazards.
Good enough safety equipment: Actually protects you from the materials you're using, fits properly so you'll actually wear it, meets minimum safety standards for the chemicals involved.
Good enough measuring tools: Accurate within the range that matters for your dye quantities, consistent (even if not perfectly calibrated), easy to read.
This isn't a craft where expensive equipment produces proportionally better results. The material quality of your fiber matters more than the brand of your dye pot. The accuracy of your mordant measurement matters more than having the fanciest scale.
The equipment facilitates the chemistry. Get equipment that doesn't interfere with the chemistry (non-reactive materials), that keeps you safe (appropriate protection), and that works reliably (doesn't fail mid-process). Everything else is optimization.