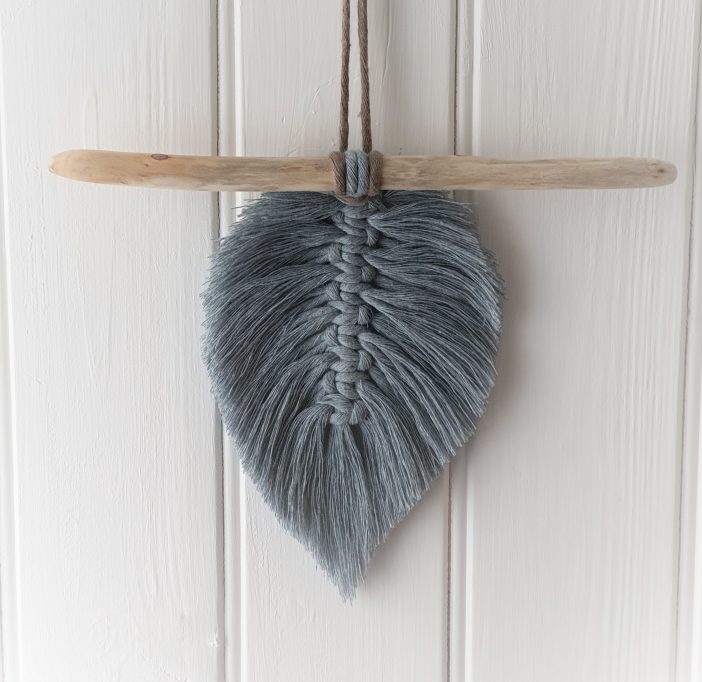
Free Macrame Feather Pattern with Video
Things have been pretty busy for me lately. Between many hours of writing and illustrating book covers, I haven't had much time to create anything crafty for a while. So I thought I would stretch my fingers for a bit and make something fun.
A few months ago, I moved to a (tiny) cottage in a village by the sea. Doing it up is a work in progress, but it's starting to feel more like home. We have a small wall by the window that needed a little something, so I thought I'd make a macrame feather and document how I did it.
Making a Macrame Feather
Here's how this feather came together. You can follow the written instructions below or make one along with me in the video - it works as either a feather or a leaf, depending on how you trim it.
It’s my first try at making a video, you can hear the seagulls and the occasional car passing through, but the video was fun to make, and so I hope to make some better ones in the future.
What Happens with Macrame Feathers
Macrame feathers tend to flop a little. Once you're happy with the shape, minimal handling keeps them looking their best. Stiffening spray exists for applying to the back. I didn't use any on mine - now that it's on the wall, I leave it where it is. When it needs dusting, I'll just comb it back into shape.
My scissors are embarrassingly blunt. They've seen one craft too many, so I need some new ones. Sharp scissors make the trimming phase considerably easier.
I used single-cord macrame rope, which separates well for fringing. The color was called raw denim. Working with macrame cord reminded me why having a decent craft light matters - the detail work during trimming requires being able to see exactly what you're doing.
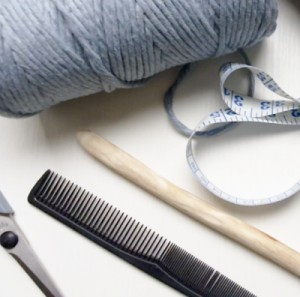
Materials Used
Here's what went into this project:
- 3m single cord macrame cord (I used Bobbiny 3mm Cord which is available on Amazon
- Sharp scissors (unlike mine)
- Tape measure
- A comb
- Approximately 7″ length of twig, dowel, or driftwood
- A 4″ x 8″ piece of card for the template
The written instructions are below.
The Process
Gather your materials first. It makes the process move more smoothly.
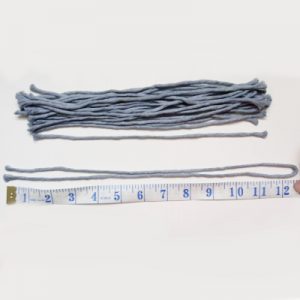
Measure and cut 22 pieces at 10″ each, plus one 25″ piece. The longer piece becomes the stem.
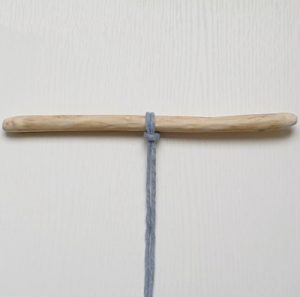
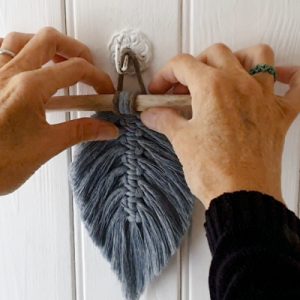
Fold the 25″ length in half and make a larks head knot over your twig or dowel. This forms the central stem that everything else attaches to.
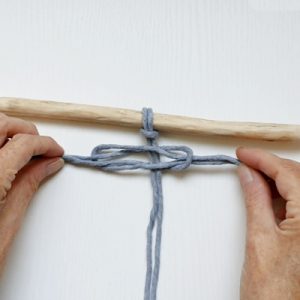
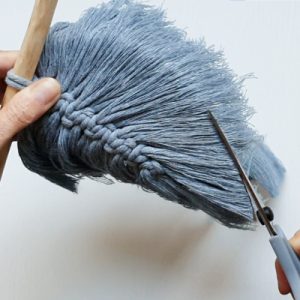
Take two of the shorter cords, both folded in half. Place one loop from the left under the stem, and one from the right over the stem - they go in opposite directions. Pass the loose ends through each loop on the opposite side. This creates the alternating pattern.
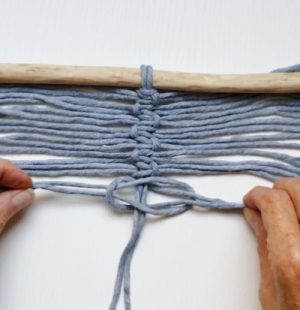
Reverse and repeat - looped cord under the stem from the right, over from the left. Continue alternating sides until all 22 lengths are used. You'll end up with 11 knots total.
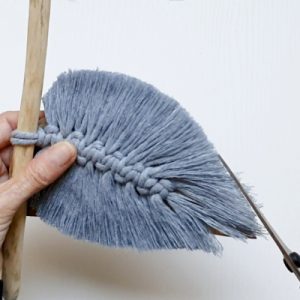
Comb through all the cords to separate the strands. This is where single-cord rope shows its advantage - it frays into individual strands that create the feathery texture.
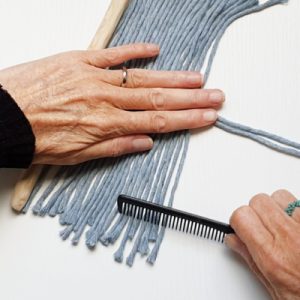
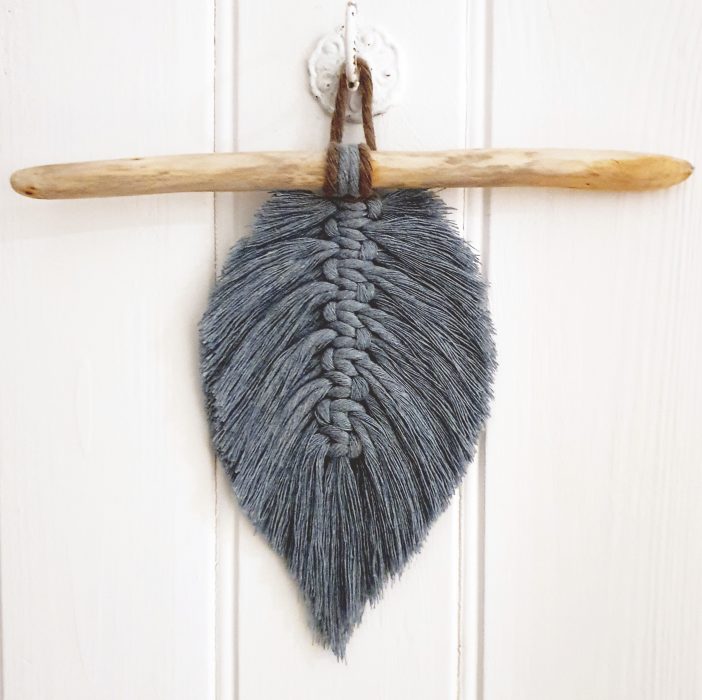
At this stage, your feather looks somewhat chaotic. The shape comes in the trimming.
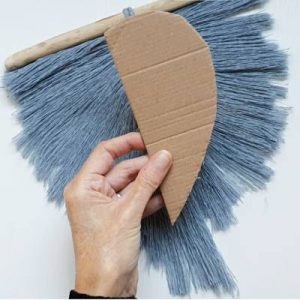
Make a template from the card. You only need half a feather or leaf shape - you'll flip it to trim the other side.
Place the template underneath, comb the fringe to straighten it, and begin trimming around the edges.
Getting an even edge takes time. Comb, check, trim, repeat. The fringe needs to be straightened before each cut, or you'll end up with unexpected gaps.
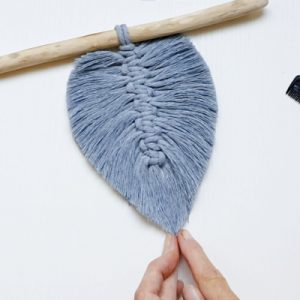
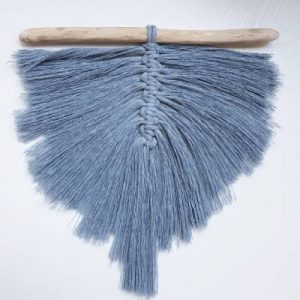
Finally, shape it with your fingers to add dimension and curve.
And it's ready to hang.
Preserving traditional craft techniques is central to the Modernhaus mission - not as historical reenactment, but as living practices that connect us to materials, process, and the satisfaction of making something with our own hands in an age of instant everything.