Hand Building With Clay: Pinch, Coil, and Slab Techniques
Hand building with clay requires no wheel, no kiln access, no specialized equipment beyond your hands and the material itself. Humans have shaped clay this way for at least 20,000 years - the oldest known ceramic objects are hand-built figurines from what's now the Czech Republic, dated around 29,000 BCE. The techniques remain fundamentally unchanged because they're based on how clay actually behaves under pressure from human hands.
Three methods define hand building: pinch, coil, and slab. Each produces specific forms that the others can't easily replicate. Pinch pots create small organic vessels limited by what your hands can reach around. Coil building stacks clay ropes to construct larger forms with visible texture or smooth walls. Slab work cuts and assembles flat clay sheets like architectural construction, making boxes, plates, and geometric structures.
These techniques work with both air dry clay and firing clay. The fundamental movements stay identical - how you pinch, how you smooth coils, how you join slabs. The difference appears in final durability and what the finished piece can do. Air dry clay ornaments dry through evaporation and stay decorative. Firing clay vitrifies in the kiln at 1,800-2,400°F, becoming waterproof and food-safe.
The accessibility matters. Studio potters spend years mastering wheel throwing - centering clay, pulling even walls, controlling symmetry. Hand building produces finished pieces in your first session. A pinch pot takes 20-30 minutes. Small coil vessels happen in an hour or two. Slab boxes complete in a single afternoon. The learning curve exists but doesn't block immediate results.
Pinch Building: What Hands Can Reach
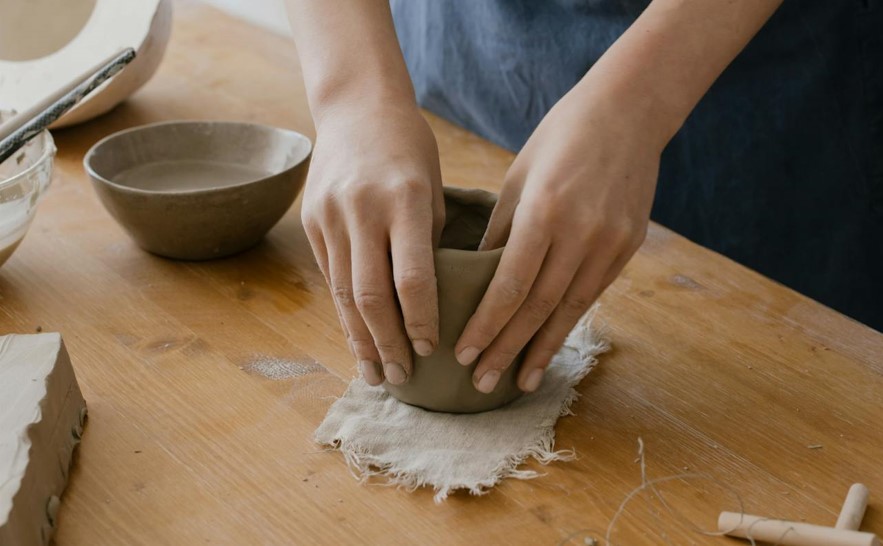
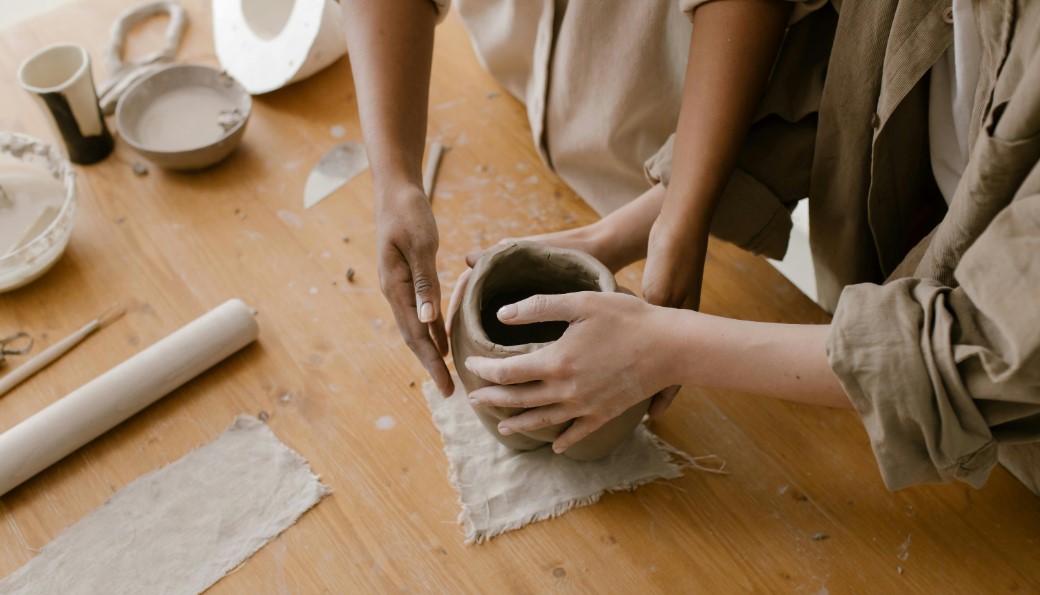
Pinch technique starts with a ball of clay pressed into a bowl shape using thumb and fingers. The most direct form of clay shaping - your thumb creates the interior space while fingers support the exterior wall. Rotating the form in your palm, you pinch upward from the base, thinning and raising the walls with each pass. The finished size depends entirely on how much clay you can comfortably hold and manipulate.
Small pinch pots measure 2-4 inches in diameter. The clay wall thickness runs 3-6mm - thick enough to support itself during shaping, thin enough to dry or fire without cracking. Thinner walls require more control but produce lighter, more refined forms. Thicker walls work better for beginners because the clay forgives uneven pressure and doesn't collapse as readily.
The technique limits scale naturally. Once a form grows beyond what your palm can support, pinch building becomes impractical. Potters working larger switch to coil or slab methods. But pinch pots excel at creating organic, asymmetrical vessels where slight irregularities enhance rather than detract. Tea bowls, small planters, decorative containers, sculptural forms that fit in cupped hands.
Ruth Duckworth built her career on pinch technique during the 1960s-70s, creating sculptural vessels that rejected the perfection of wheel-thrown symmetry. Her forms ranged from 3-inch pods to 12-inch landscape-like pieces, all shaped through sustained pinching and smoothing. The work sold for $200-800 in the 1970s (roughly $1,200-4,800 today), establishing hand-built ceramics as legitimate art objects rather than crude alternatives to wheel work.
Surface texture on pinch pots shows your working method. Visible finger marks create organic texture that many potters preserve rather than smooth away. The marks document the making process - each pinch reading as a deliberate gesture. Smooth surfaces require additional work, scraping and burnishing after the initial shaping to eliminate texture. Both approaches appear in studio ceramics, representing different aesthetic choices about whether to reveal or conceal the hand.
Clay behavior during pinching changes as you work. Fresh clay stays plastic and responds immediately to pressure. After 10-15 minutes of handling, body heat begins drying the surface. The clay stiffens slightly, requiring more force to move. Keeping fingertips slightly damp maintains workability, but too much water weakens the clay structure and can cause collapse. The balance point feels like leather - flexible but not mushy.
Pinch pots made from air dry clay complete without firing. The polymer-based material dries through evaporation over 48-72 hours. The finished vessel remains porous and can't hold water long-term, but works perfectly for decorative use or as a planter with a waterproof liner. Earthenware clay pinch pots require bisque firing to 1,800-1,900°F for durability, then glaze firing if you want waterproof surfaces.
Modernhaus documents studio pottery from wheel to kiln.
Explore the Clay Studio →Coil Building: Stacking Height
Coil technique constructs forms by stacking clay ropes, then smoothing or blending the joints. The method builds height incrementally - each coil adds another ring to the growing wall. Ancient pottery traditions worldwide used coil building for storage vessels, cooking pots, and ceremonial objects. The technique appears in Pueblo pottery of the American Southwest, African water jars, Neolithic European vessels. Anywhere potters needed large forms without wheel access, coiling provided the solution.
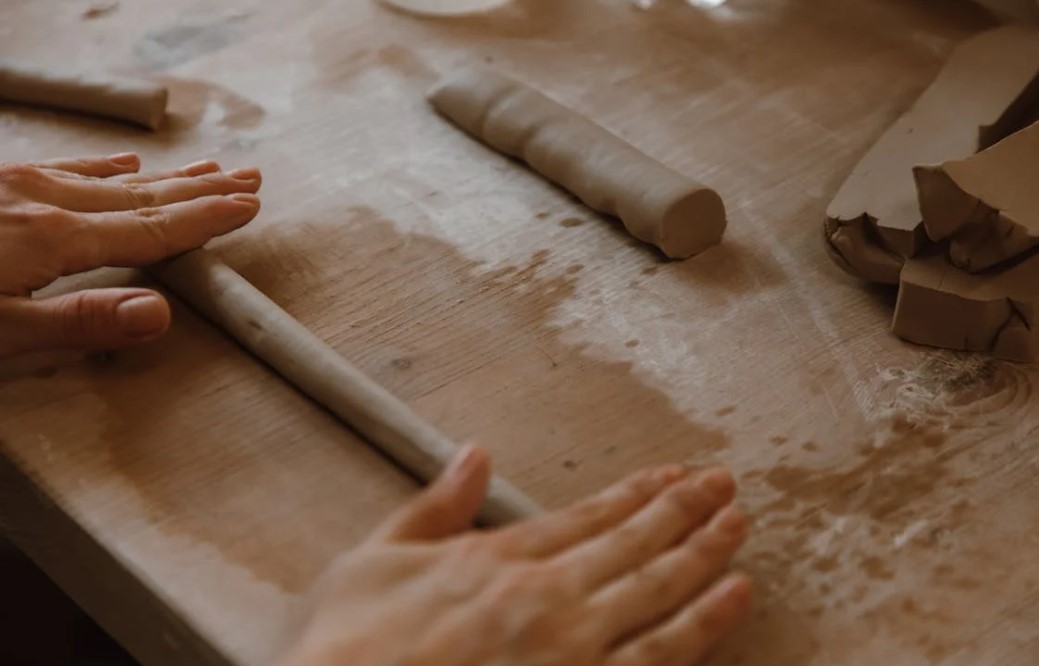
Making coils involves rolling clay under your palms against a flat surface. Back and forth motion with even pressure creates uniform diameter ropes. Beginner coils typically run 1/2 to 3/4 inch thick - thin enough to curve smoothly, thick enough to handle without breaking. Advanced potters work with 1/4-inch coils for refined control, or 1-inch coils for rapid building on large sculptural forms.
The base starts as either a coil spiral or a flat slab. Spiral bases build from a tight center coil that expands outward like a cinnamon roll cross-section. Slab bases provide a flat bottom by cutting a circle or other shape from rolled clay. Each method affects the finished pot differently - spiral bases show their construction method, slab bases hide it under the first wall coils.
Stacking coils requires scoring and slip at each joint for secure attachment. Scoring means scratching the clay surface with a fork, knife edge, or specialized tool to create texture. Slip is liquid clay with cream consistency that acts as glue. Apply slip to both scored surfaces, press the new coil onto the previous layer, then smooth the joint. Without this preparation, coils separate during drying or firing as the clay shrinks.
The smoothing decision determines visual character. Leaving coils visible creates horizontal texture that emphasizes the building process. Native American pottery often preserves coil texture as deliberate surface decoration. Smoothing coils completely, blending each joint until walls read as continuous surface, creates forms that could pass as wheel-thrown. Both approaches appear in contemporary ceramics based on aesthetic intent.
Building speed for coil pots varies wildly with size and experience. A 6-inch bowl takes beginners 2-3 hours including coil rolling, stacking, and smoothing. The same pot takes experienced potters 45 minutes. Large vessels measuring 18-24 inches tall can consume 8-12 hours over multiple sessions - you can only stack so much height before the weight of upper coils deforms lower walls. The clay needs to stiffen between building sessions.
Peter Voulkos revolutionized coil building in the 1950s by treating it as sculptural technique rather than vessel production method. His stacked forms reached 3-4 feet tall with deliberately rough surfaces, punctured walls, and aggressive alterations after building. The work rejected the careful refinement typical of studio pottery, embracing accident and gesture. Pieces sold for $500-2,000 in the 1960s, establishing hand-built ceramics as equivalent to abstract sculpture.
Coiling with air dry clay works identically to firing clay during construction. The difference appears in final strength - air dry coil pots remain relatively fragile, best used decoratively. Firing clay coil vessels become as durable as wheel-thrown work once fired to temperature. Large coil-built planters, decorative vessels, and sculptural forms all fire successfully if wall thickness stays under 1 inch and joints are properly scored and slipped.
Slab Building: Architectural Construction
Slab technique cuts and assembles flat clay sheets into three-dimensional forms. Think origami with weight and gravity. The method produces boxes, angular vessels, plates, tiles, architectural forms that coiling and pinching can't efficiently make. Slab work appeared in ancient architecture - clay bricks are essentially small slabs fired for durability. Contemporary ceramics use slab building for everything from functional dinnerware to large-scale sculpture.
Rolling slabs requires even thickness across the entire sheet. A rolling pin works for small pieces up to 8x10 inches. Larger slabs need a slab roller - a machine with adjustable rollers that compress clay to precise thickness. Studio slab rollers cost $800-2,500 depending on size. Many community studios and art schools have them available for member use. The alternative involves rolling by hand with guide sticks taped to your work surface - wooden strips of identical thickness placed on either side of the clay, rolling pin resting on both guides.
Standard slab thickness runs 1/4 to 3/8 inch for functional work. Thinner than 1/4 inch and the clay becomes fragile during construction and prone to warping. Thicker than 1/2 inch and you're working with heavy, awkward material that dries and fires slowly. The painted clay ornaments technique uses thin slabs at 2-3mm because the pieces stay flat and small - no structural demands.
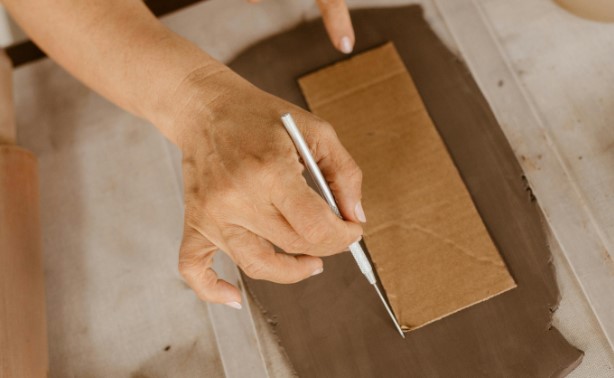
Cutting slabs happens with knife, needle tool, or potter's knife depending on precision needs. Straight edges use a ruler and knife. Curved shapes need templates cut from cardboard or plastic, then traced onto the clay with a needle tool. Clean cuts matter - dragged or rough edges don't join cleanly and create weak points in the finished form.
Joining slabs uses the same score-and-slip method as coiling. Both edges get scored, slip applied, then pressed together firmly. The joint initially looks rough and obvious. Smoothing with a wooden tool or finger blends the seam, creating continuous surface. Interior corners often stay visible because access is limited once you've closed the form. Exterior corners can be refined completely smooth or left slightly visible as design elements.
Slab boxes demonstrate the technique clearly. Six slabs - four walls, top, and bottom - scored, slipped, and assembled. The construction sequence matters: typically bottom first, then four walls attached to the base and each other, finally the top or leaving it open. Each joint needs support while the slip dries enough to hold - props, foam blocks, or carefully angled position. Rush the assembly and walls collapse inward.
Plates and platters use single slabs draped over or into molds. A hump mold (convex form) supports the slab from underneath while you shape the rim. A slump mold (concave form) cradles the slab from the inside. The clay takes the mold's curve as it stiffens. Once leather-hard - firm enough to handle but not fully dry - you remove the plate and refine the rim and foot. Production potters make dozens of identical plates this way.
Florence Knoll commissioned slab-built ceramic pieces for her interior designs during the 1950s-60s. The geometric precision of slab work matched the clean lines of her furniture. Architectural planters, rectilinear vases, modular serving pieces - all took advantage of slab building's ability to create precise angles and flat surfaces. These pieces retailed for $40-150 in 1960 ($400-1,500 today), positioning handmade ceramics as design objects rather than rustic craft.
Slab building with air dry clay works well for flat pieces like ornaments, tiles, and relief sculpture where structural demands stay minimal. Three-dimensional slab boxes in air dry clay tend toward fragility - the material lacks the structural strength that firing provides. For functional boxes, planters, or dinnerware, firing clay becomes necessary. The vitrification process fuses clay particles, creating strength that air drying can't achieve.
Time Investment and Skill Development
Hand building produces visible results immediately but reveals its depth over years. First-session pinch pots look like pinch pots - slightly lumpy, uneven walls, organic shapes that work decoratively. After 20-30 practice pieces, walls thin out, symmetry improves, surface control develops. The gap between "made a thing" and "made a refined thing" spans months of regular practice.
Coil building shows similar progression. Early attempts produce wobbly walls, visible joints, forms that lean or warp during drying. The coordination required to roll even coils, stack them level, smooth joints completely without distorting the form - all this develops through repetition. Most potters make 10-15 coil pots before the technique clicks and forms start looking intentional rather than accidental.
Slab work requires the most planning and spatial reasoning. Visualizing how flat pieces become three-dimensional forms, calculating shrinkage so joints align after drying, supporting pieces during construction - the mental load exceeds pinching or coiling. But the technique also offers more immediate precision. Clean cuts and careful assembly can produce refined forms early in the learning process.
Studio potters typically practice all three techniques rather than specializing. Different projects demand different approaches. Small organic forms need pinching. Large vessels require coiling. Architectural pieces want slab construction. The techniques also combine - slab bases with coil walls, pinched details added to slab boxes, coils blending into sculpted forms. Fluency across methods provides maximum creative flexibility.
Community studio access costs $50-150 monthly in most US cities, including firing fees, equipment use, and open studio time. This covers wheel access, hand building tables, kiln firing, glaze materials. For hand building specifically, home practice becomes viable with minimal investment. A 25-pound bag of earthenware clay costs $15-25. Basic tools (wire cutter, needle tool, smoothing ribs) run $20-30. You can hand build for months before needing firing access.
Air dry clay eliminates firing requirements entirely, dropping the barrier even further. Practice hand building techniques with polymer clay that costs $8-12 per package. The forms won't hold water or survive outdoor conditions, but the hand skills transfer directly to firing clay once you want functional ceramics. Many potters start with air dry clay for this reason - learn the techniques without equipment access, then transition to firing clay later.
Clay Behavior Across Techniques
Understanding how clay responds to different handling methods matters more than memorizing specific techniques. Clay behaves as a plastic solid - it holds shape when still, deforms under pressure, and remembers stress. These properties affect every hand building method.
Plasticity describes clay's ability to deform without cracking or springing back. High plasticity means the clay moves easily under hand pressure and stays where you put it. Low plasticity creates stiff, short clay that cracks when bent. Most pottery clay bodies balance plasticity with other properties - too plastic and the clay slumps under its own weight, not plastic enough and it breaks during shaping.
Water content determines working consistency. Clay straight from the bag typically arrives at optimal throwing consistency - soft enough to move on the wheel, firm enough to hold shape. Hand building often works better with slightly stiffer clay that supports itself during construction. If your clay feels too soft, wedging it on plaster bats or letting it sit exposed to air for 30-60 minutes stiffens it appropriately.
Drying generates stress in clay as water evaporates and particles draw closer together. Uneven drying creates uneven stress, causing warping and cracks. Thick sections dry slower than thin sections. Covered edges dry slower than exposed surfaces. Managing drying speed prevents most hand building failures. Slow, even drying under plastic sheeting over 3-5 days produces stable forms. Fast drying in direct sun or near heat sources produces cracks within hours.
The leather-hard stage represents optimal timing for many finishing techniques. The clay has stiffened enough to support careful handling but retains enough moisture to accept new attachments and smoothing. Handles get added at leather-hard. Surface carving happens at leather-hard. Trimming excess clay from bases works at leather-hard. The window lasts roughly 12-24 hours depending on clay thickness and ambient humidity.
Shrinkage happens twice - first during drying, then during firing. Drying shrinkage runs 5-8% for most clays as water evaporates. Firing shrinkage adds another 8-12% as the clay vitrifies and particles fuse. Total shrinkage from wet to fired ranges 13-20%. Hand builders learn to work larger than desired finish size, accounting for this reduction. A 6-inch pinch pot at wet stage becomes 5 inches after firing.
Air dry clay behaves differently because its composition differs fundamentally. The polymer binders don't shrink like natural clay minerals. Drying shrinkage stays under 5%. No firing means no secondary shrinkage. The material also lacks plasticity of firing clay - it's stiffer, slightly sticky, less responsive to subtle pressure. Hand building techniques transfer but the tactile feedback changes.
The Equipment Reality
Hand building requires remarkably little equipment compared to wheel throwing or glaze mixing. The basics fit in a shoebox: wire clay cutter ($3-5), needle tool ($4-6), wooden smoothing rib ($5-8), small sponge ($2), and plastic scraper ($3-5). Total investment under $30. Everything else comes down to improvisation and what you already own.
Rolling pins substitute for specialized clay rollers on small projects. Kitchen rolling pins work fine if dedicated solely to clay - never use the same rolling pin for food and clay. Wine bottles, PVC pipe, anything cylindrical with smooth surface can roll slabs. The $800 studio slab roller offers convenience and precision but isn't required for learning.
Work surfaces need to be non-porous and flat. Canvas, heavy fabric, or plaster bats prevent sticking without adding texture. Some potters work directly on wooden tables or melamine boards. Drywall squares ($8 each from hardware stores) make excellent portable work surfaces - cut them to 16x16 inches, smooth the edges, and you have reusable bats that absorb excess moisture from wet clay.
Texture tools include anything with interesting surface pattern. Fabric, leaves, carved wood blocks, kitchen utensils, hardware store finds. The commercial pottery supply catalogs sell texture rollers and stamps for $12-45, but most potters accumulate texture tools from thrift stores and nature walks. A $2 doily from a thrift store creates as much interesting texture as a $30 commercial roller.
Storage for work in progress matters more than fancy tools. Plastic sheeting, garbage bags, or dedicated plastic boxes with lids keep clay from drying between work sessions. Spray the piece lightly with water, wrap it completely in plastic, and hand-built forms stay workable for a week or more. Without proper storage, clay dries rock-hard overnight and becomes unusable.
Drying racks can be wire cooling racks from the kitchen, wooden slat shelves, or fabric-covered boards. The goal is air circulation under and around the piece to promote even drying. Putting wet clay directly on a table means the bottom dries slower than the top, increasing warp and crack risk. A $12 cooling rack from a home goods store works as well as a $60 pottery drying rack.
Where Hand Building Appears in Contemporary Work
Hand building dominates sculptural ceramics because it produces forms wheel throwing can't make. Asymmetrical vessels, geometric constructions, organic sculptures, architectural pieces, figurative work - all require hand building techniques. The major ceramic art movements of the past 50 years emerged from hand builders rather than wheel throwers.
The American Studio Craft movement of the 1950s-70s elevated hand-built ceramics to fine art status. Voulkos, Duckworth, Kenneth Price, Robert Arneson - all worked primarily through hand building methods. Their pieces sold in galleries alongside painting and sculpture rather than in craft shops. This positioning changed how ceramic objects were valued and understood.
Functional pottery uses hand building less frequently but strategically. Handles on mugs get hand-formed and attached. Spouts on teapots are pulled and shaped by hand. Plates often start as slab work. Even wheel-thrown pieces incorporate hand-building details that add visual interest and improve function. The combination of techniques produces more varied forms than either method alone.
Architectural ceramics rely almost entirely on slab building. Tile work, ceramic cladding, decorative panels, large-scale installations - all use slab technique for its ability to produce flat, precise shapes. The glazed terra cotta facades on Art Deco buildings came from slab construction. Contemporary ceramic artists creating wall pieces and room installations work with slabs measuring several feet across.
Production pottery occasionally uses hand building for efficiency. Making 50 identical slab plates from a mold takes less skill and time than throwing 50 plates on the wheel. The consistency improves because the mold determines final shape rather than hand-eye coordination. Small ceramic companies producing dinnerware lines often use slab molds for plates and bowls, saving wheel throwing for pieces that benefit from symmetry.
The economic positioning of hand-built work spans from functional production to high-end art objects. Simple pinch pots at craft fairs sell for $15-45 depending on size and surface treatment. Mid-range decorative vessels from established studio potters command $150-500. Sculptural work by recognized ceramic artists sells for $2,000-50,000+ in galleries. The technique itself doesn't determine value - refinement, originality, and maker reputation do.
Making This Accessible
Hand building works for complete beginners because it doesn't require centering, pulling, or the coordination demands of wheel throwing. Your first attempt produces something recognizable. Maybe lumpy, maybe asymmetrical, but recognizably a bowl or vessel or form. That immediate feedback loop keeps people engaged through the awkward early learning phase.
Start with pinch pots using 1-2 pounds of clay. Make 5-6 in a single session. They'll all look different because you're learning how much pressure to apply, how to rotate the form, how to thin walls without creating weak spots. By pot #4 or #5, noticeable improvement appears. Not perfect, but better. That progression happens in a single afternoon.
Coil building as a second project builds on pinch pot skills. You already understand how clay responds to pressure and how to smooth surfaces. Adding the coiling technique gives you height and scale. A simple coil bowl 5-6 inches tall takes 2-3 hours including learning the coil-rolling rhythm. The form won't be perfectly symmetrical, but it will hold together and look intentional.
Slab work waits until you understand clay stiffness and leather-hard timing. Early slab projects fail when potters try to assemble pieces too wet (they slump) or too dry (joints crack). After making pinch pots and coil vessels, you've developed intuition about clay consistency. Small slab boxes measuring 4x4 inches make good first projects - large enough to practice joining corners, small enough that mistakes don't consume lots of clay or time.
Practice materials don't need to be expensive. A 25-pound bag of earthenware or stoneware clay costs $15-25 and makes 30-40 practice pieces. If kiln access isn't available yet, air dry clay eliminates that barrier while letting you build the hand skills. The muscle memory of pinching, coiling, and slab assembly transfers directly between clay types.
Studio access through community art centers, adult education programs, or ceramic supply stores that offer classes provides equipment and guidance without large upfront investment. Most facilities charge $50-100 for a 6-8 week beginner course including materials and firing. This gets you instruction, workspace, and kiln access to complete projects start to finish.
The satisfaction of hand building comes from direct tactile engagement with material. Your hands shape the clay without mechanical mediation. Every curve, every surface texture, every form decision comes from your choices about where to apply pressure and when to stop. That directness appeals to people regardless of whether they become serious potters or simply enjoy the occasional session working with clay.