Workshop
The Textile Studio
Understanding weaving, natural dyeing, and spinning through the lens of mid-century design philosophy: honest materials, functional beauty, and techniques that create lasting value.
Mid-Century Modern & Textile Craft
The mid-century modern movement championed honest materials and functional beauty. Designers like Marianne Strengell at Cranbrook and Dorothy Liebes in San Francisco proved that handwoven textiles belonged in modern interiors, not as nostalgic decoration but as contemporary design objects. Their work emphasized material integrity, color theory, and the inherent beauty of skilled craft.
This studio continues that philosophy. Traditional weaving, natural dyeing, and spinning techniques applied with modern understanding create textiles that work in actual spaces. These aren't historical demonstrations or heritage crafts preserved in amber. They're living techniques that produce functional objects worth the time they require.
The mid-century designers understood something crucial: handmade doesn't mean precious or delicate. Strengell's upholstery fabrics withstood decades of use in Saarinen chairs. Liebes's draperies hung in corporate lobbies and private homes, proving durability through daily exposure. Good textile work serves its purpose reliably, whether that's a woven dishtowel or naturally dyed yarn for a sweater that lasts years.
Marianne Strengell
Cranbrook Academy, pioneered modern textile education
Dorothy Liebes
San Francisco, "the mother of modern weaving"
Jack Lenor Larsen
Industrial textile design, global craft techniques
Anni Albers
Bauhaus weaver, material innovation
Weaving: Getting Started
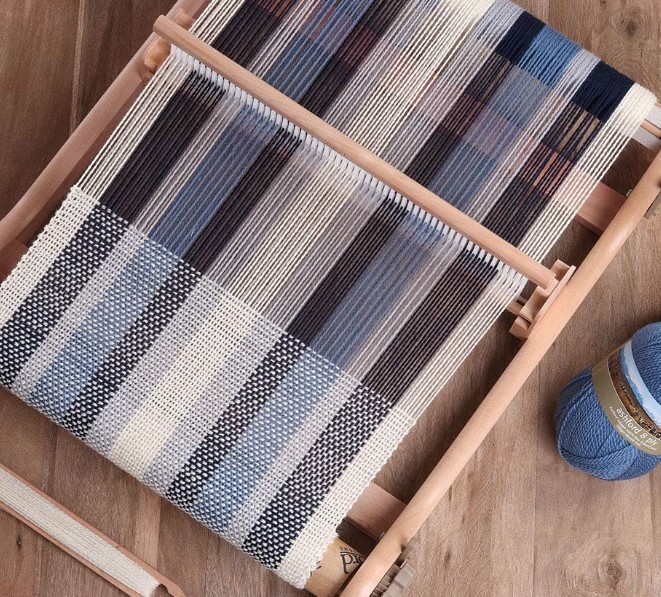
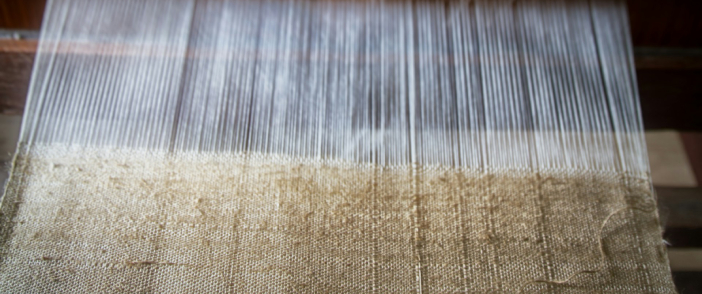
Weaving interlaces perpendicular threads into stable fabric structure. Warp threads held under tension, weft threads passed through them, creating cloth that won't unravel. The fundamentals haven't changed in centuries, but modern rigid heddle looms make the process accessible for home weavers producing scarves, towels, placemats, and simple yardage.
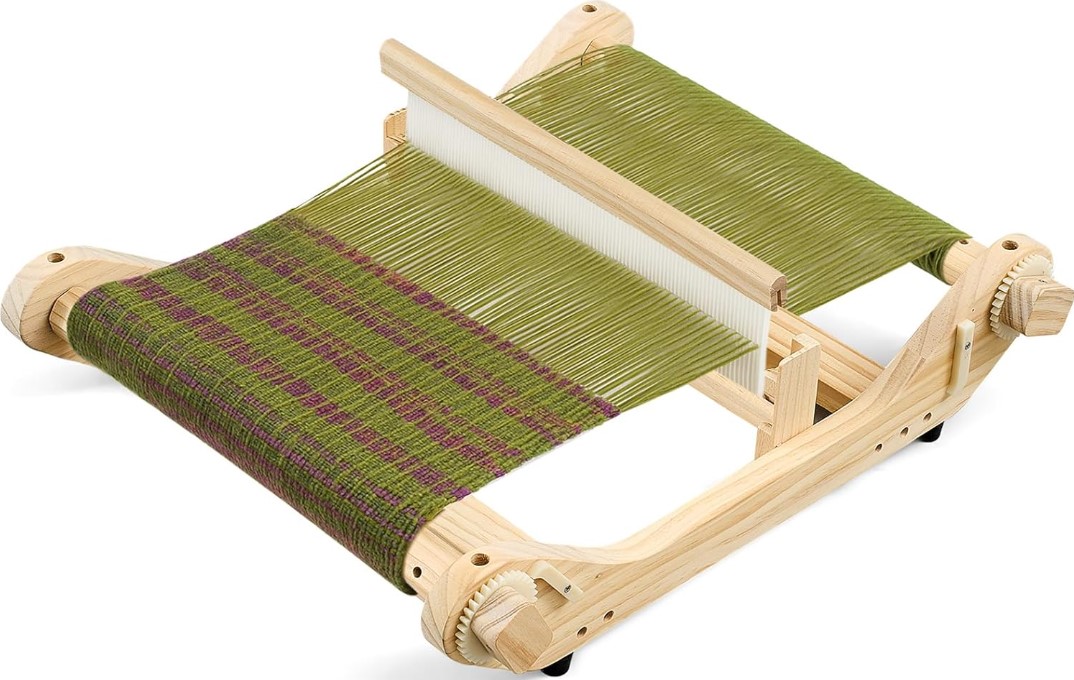
Understanding Rigid Heddle Looms
Rigid heddle looms combine the heddle (thread separator) and reed (spacing guide) into a single rigid frame. This simplification means you can't weave complex patterns like twills or damasks, but you gain portability, affordability, and a learning curve measured in hours rather than months. For someone wanting to weave functional items at home, rigid heddle looms provide everything necessary.
The heddle slots and holes create two sheds (thread arrangements). When the heddle sits neutral, some threads pass through slots, some through holes. Raising the heddle lifts hole threads above slot threads. Lowering it does the opposite. Alternating these positions while passing weft through creates plain weave, the fundamental interlaced structure underlying all textiles.
Loom Selection: Specific Models
Rigid heddle looms differ primarily in width, construction quality, and included features. Width determines maximum fabric size. Construction quality affects tension consistency and longevity. Features like multiple heddle capacity or integrated stands impact workflow and pattern possibilities.
Ashford Knitters Loom
$250-400
- Widths: 12", 20", 28"
- Lightweight beech construction
- Folds flat for storage
- Optional stand available
- Best for: portability, small spaces
Schacht Cricket Loom
$300-450
- Widths: 10", 15"
- Maple construction, very sturdy
- Accommodates two heddles for pick-up patterns
- Excellent tension system
- Best for: serious hobbyists, quality build
Ashford Rigid Heddle
$350-600
- Widths: 16", 24", 32", 48"
- Accommodates multiple heddles
- Variable heddle spacing for different yarn weights
- Optional stand highly recommended
- Best for: production weaving, larger projects
Essential Accessories
Beyond the loom itself, you need shuttles (hold weft thread), warping pegs (measure warp length), and a threading hook (pull warp through heddle). Budget $50-80 for these basics. A warping board ($40-80) simplifies measuring long warps but isn't essential initially. Clamps to secure the loom to a table prevent frustrating movement during weaving.
Yarn Selection for Weaving
Warp yarn requires strength to withstand tension and abrasion during weaving. Smooth, tightly plied yarns work best. Cotton, linen, and strong wool blends serve well for warp. Avoid stretchy yarns (elastic fibers, loosely spun wools) and highly textured novelty yarns for warp.
Weft yarn has fewer restrictions since it doesn't experience the same stress. Textured yarns, looser spins, and softer fibers all work for weft. Many weavers use sturdy cotton warp with varied weft yarns to create different fabric characteristics from the same warp setup.
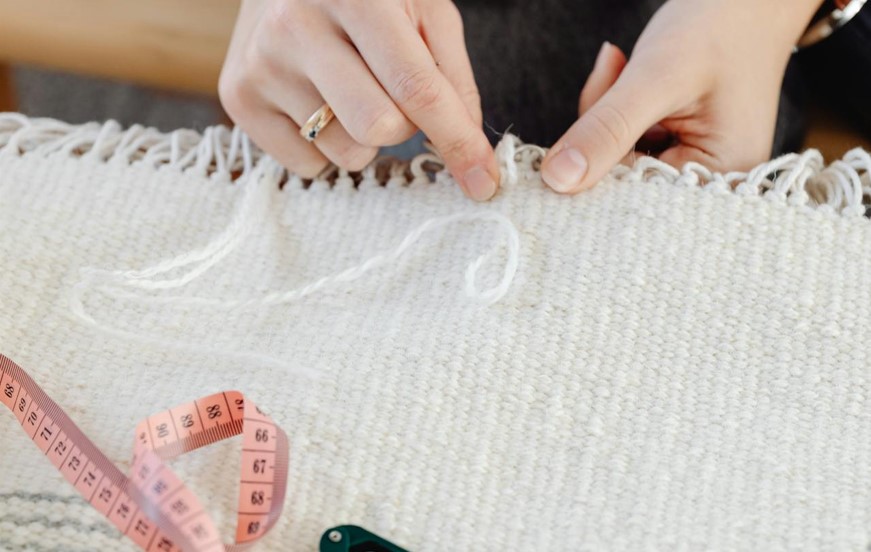
First Projects That Teach Skills
Start with a simple scarf. Scarves forgive tension inconsistencies and selvage problems that would ruin towels or placemats. Use solid color warp and weft initially to focus on technique rather than color management. A 6-8 inch wide scarf in 5/2 cotton requires approximately 300 yards of yarn and teaches the complete weaving cycle: warping, threading, weaving, and finishing.
Progress to dishtowels next. Towels demand better tension control and consistent beat (how firmly you pack weft threads). They also teach finishing techniques like hemming or hemstitching. Four matching towels from one warp provides practice in maintaining consistency across multiple pieces.
Common Beginner Problems
Tension inconsistency causes most early frustration. Some warp threads looser than others create wavy fabric that won't lie flat. This usually starts during warping. Using a warping board or measuring carefully on warping pegs helps maintain consistent thread length, which translates to consistent tension on the loom.
Selvages (fabric edges) pulling in happens when weft tension exceeds warp tension. The weft draws edges inward, making fabric narrower at edges than center. Enter weft at a slight angle rather than straight across. This provides enough slack to maintain fabric width without pulling in edges.
Broken warp threads will happen eventually. Don't panic. Weight the broken end with something heavy hanging off the back of the loom. Tie a new thread to the broken end using a square knot. Continue weaving. The knot will pass through the heddle without problems, though you'll need to trim and secure it during finishing.
Space and Cost Reality
A rigid heddle loom setup requires approximately 2'x3' of working space plus storage for yarns and tools. The loom itself folds or stores relatively compactly, but yarn stash expands steadily. Plan storage for works in progress, finished pieces awaiting final finishing, and accumulated yarn.
Initial investment runs $350-500 for a quality loom, shuttles, warping equipment, and first project supplies. Ongoing project costs average $30-60 for materials, depending on fiber choice and project size. Unlike knitting or crochet, weaving produces finished yardage relatively quickly once you develop rhythm, making it efficient for producing household textiles.
Natural Dyeing: Color from Plants
Natural dyes permanently bond color molecules to fiber through chemical reactions, not surface coating. This requires mordants (metal salts that create chemical bridges between fiber and dye) and careful temperature control. The process takes time and attention, but produces colors with depth and complexity synthetic dyes rarely match.
Why Natural Dyes Matter
Natural dyes offer specific advantages beyond aesthetic preference. Many natural dyes demonstrate excellent lightfastness, matching or exceeding synthetic alternatives. Madder reds, indigo blues, and certain yellows from weld maintain color for decades when properly applied. The subtle color variations batch to batch create visual interest impossible with synthetic uniformity.
Environmental considerations matter less than commonly claimed. Natural dye extraction often uses significant energy (heating large water volumes for extended periods) and mordants are metal salts requiring careful disposal. The environmental advantage comes primarily from using renewable dye sources versus petrochemical synthetic dyes, not from the process itself being inherently "green."
Essential Equipment
Natural dye equipment can't be used for food preparation afterward. Mordants and dye materials make pots unsuitable for cooking. This means dedicated equipment, increasing initial investment but preventing any safety concerns about contamination.
| Equipment | Purpose | Specifications | Cost |
|---|---|---|---|
| Dye Pot | Heating fiber in dye bath | Stainless steel or enamel, 5+ gallon | $40-80 |
| Mordant Pot | Pre-treating fiber | Stainless steel, 3-5 gallon | $30-60 |
| Heat Source | Maintaining temperature | Outdoor propane burner or electric hotplate | $50-150 |
| Thermometer | Monitoring temperature | Instant-read, 32-220°F range | $12-25 |
| Scale | Measuring dyes and mordants | Digital, 0.1g precision, 500g+ capacity | $15-30 |
| pH Strips | Testing dye bath acidity | Paper strips, range 1-14 | $8-15 |
Understanding Mordants
Mordants are metal salts that bond to fiber and create attachment sites for dye molecules. Without mordants, most natural dyes wash out immediately or fade within days. With proper mordanting, colors last decades.
Alum (aluminum potassium sulfate) serves as the standard mordant for most applications. It provides clean colors without significant fiber damage and works across both protein (wool, silk) and cellulose (cotton, linen) fibers. Use 15-20% of fiber weight for protein fibers, 20-25% for cellulose.
Iron (ferrous sulfate) darkens colors and shifts them toward grey-green tones. It's called a "sadden agent" in dyeing terminology. Iron weakens fiber over time, so use sparingly, typically 1-2% of fiber weight, and only when the color shift is desired.
Copper (copper sulfate) creates blue-green shifts and enhances greens from yellow dyes. Tin (stannous chloride) brightens colors and intensifies yellows and reds. Both can damage fiber if overused. Stick to 2-4% of fiber weight maximum.
Reliable Color Sources
Not all plants produce usable dyes. Many create pretty colors in the dye pot that wash out immediately or fade within weeks. Focus on dyes with proven track records for permanence and reliability.
| Dye Source | Colors Produced | Lightfastness | Difficulty Level |
|---|---|---|---|
| Madder Root | Red, orange, pink, coral | Excellent | Moderate (temperature-sensitive) |
| Indigo | Blue (light to dark) | Excellent | Complex (vat dyeing process) |
| Weld | Bright yellow, yellow-green | Excellent | Easy |
| Cochineal | Red, pink, purple, burgundy | Excellent | Easy (expensive material) |
| Walnut Hulls | Brown (light to dark) | Excellent | Easy (no mordant required) |
| Black Walnut | Dark brown to black | Excellent | Easy (substantive dye) |
| Cutch | Brown, rust, terra cotta | Good to Excellent | Easy |
| Onion Skins | Yellow, orange, brown | Moderate | Easy (good for learning) |
The Dyeing Process
Mordanting
Dissolve mordant in warm water. Add fiber (pre-wetted in warm water) and heat to 180-200°F for protein fibers, 200-210°F for cellulose. Maintain temperature for 1 hour. Cool slowly, then rinse gently.
Dye Extraction
Simmer dye material in water for 30-90 minutes depending on source. Strain out plant material. The resulting liquid is your dye bath. Use dye bath immediately or freeze for later use.
Dyeing
Add mordanted fiber to dye bath. Heat gradually to appropriate temperature (varies by dye and fiber). Maintain temperature for 30-60 minutes, stirring occasionally for even color. Some dyes work best with slow cooling in the dye bath.
Rinsing and Finishing
Rinse fiber in progressively cooler water until rinse water runs clear. For protein fibers, finish with a mild soap wash to remove excess dye. Hang to dry away from direct sunlight.
Fiber Considerations
Protein fibers (wool, silk, alpaca) accept natural dyes readily, particularly with alum mordant. They dye at lower temperatures, making the process somewhat easier. However, excessive heat and agitation cause felting in wool, requiring careful handling throughout the process.
Cellulose fibers (cotton, linen, hemp) require higher temperatures and often need more mordant to achieve similar color depth. They tolerate heat and agitation better than protein fibers but demand more energy input for the dyeing process. Some dyers pre-treat cellulose fibers with tannins before mordanting to improve dye uptake.
Consistency and Record Keeping
Natural dyes vary batch to batch because plant chemistry changes with growing conditions, harvest timing, and storage. Achieving consistent color requires meticulous record keeping: exact dye amounts, mordant quantities, fiber weights, temperatures, pH levels, and timing.
Water chemistry affects results significantly. Minerals in hard water alter dye chemistry and final colors. Using distilled water provides consistency but adds cost. Recording local water characteristics in dye notes helps explain unexpected color variations.
Realistic Expectations
Natural dyeing takes time. A single dye session (mordanting plus dyeing) consumes 3-5 hours minimum, often more. Multiple dye baths or complex colors like purple (over-dyeing yellow and blue) take entire days. Factor this time commitment into project planning.
Initial equipment investment runs $150-250 for pots, heat source, thermometer, scale, and basic dye materials. Ongoing costs depend on fiber quantity and dye choices. Common dyes like madder, weld, and cochineal cost $15-40 per 100g, enough to dye several pounds of fiber.
Spinning: Creating Yarn from Fiber
Spinning transforms loose fiber into continuous yarn by adding twist that locks fibers together. This fundamental textile skill predates weaving historically and provides complete control over yarn characteristics: thickness, twist amount, fiber blends, and texture. The learning curve is steeper than weaving, but spinners develop a different appreciation for yarn and fiber properties.
Why Spin Your Own Yarn
Handspun yarn enables specific characteristics impossible to find commercially. Want thick-and-thin art yarn with deliberate texture variations? Singles yarn (unplied) for specific knitting effects? Custom fiber blends combining multiple wool breeds or mixing wool with silk? Spinning provides these options.
Cost considerations work differently than other textile crafts. Raw fiber costs less per pound than commercial yarn, but spinning time adds value. Spinning makes economic sense primarily for spinners who enjoy the process itself, not as a cost-saving measure compared to purchasing yarn.
Spindles vs Wheels
Drop spindles cost $25-60 and teach fundamental spinning mechanics without significant investment. They work entirely from hand motions, making them portable and requiring no special setup. However, they're slower than wheels and have steeper learning curves for most people. Plan weeks of regular practice to achieve consistent yarn on a spindle.
Spinning wheels cost $350-900 for functional models. They enable faster yarn production once basic skills develop and provide better control for consistent yarn. Wheels require dedicated space (approximately 2'x3') and aren't portable. For serious spinning, wheels justify their cost through efficiency and ergonomics.
Fiber Preparation
Raw fiber requires processing before spinning. Commercially prepared roving or top (fiber aligned and ready to spin) costs more but eliminates preparation steps. Processing raw fleece yourself involves washing, picking, and carding or combing, adding substantial time before actual spinning begins.
Many spinners start with commercially prepared fiber to focus on spinning technique. After developing basic skills, they explore fiber preparation as a separate skill set. This approach prevents overwhelming beginners with too many simultaneous new processes.
What We're Building
Comprehensive spinning content is under development. Detailed guides will cover wheel selection, fiber types and characteristics, spinning techniques for different yarn styles, and fiber preparation methods. This introduction provides context for how spinning fits into the broader textile studio, with full resources coming as the site develops.
Related Guides

What Yarn Works for Rigid Heddle Looms?
The yarn doesn't know whether you're knitting or weaving with it. But the terminology will make you question everything.

Yarn Weights and Rigid Heddle Dent Sizes
A factual breakdown of yarn weight classifications and rigid heddle dent sizes. Learn what the measurements mean and how manufacturers determine compatibility.
A Buyer's Guide to Rigid Heddle Looms
Comparing brands, understanding what features actually matter, making the choice that fits your projects.
Rigid Heddle Loom Width Guide
Understanding how loom width affects your projects and what size actually makes sense for your space and weaving goals.
Warping Direct vs Indirect
Direct and indirect warping aren't beginner versus advanced techniques. They're completely different approaches with distinct time investments and tension characteristics.
Danish Oil and Wood Finishes for Looms
A factual breakdown of wood finishes for looms. Learn what Danish oil actually contains and how different finishes protect weaving equipment.