Workshop
The Stone Studio
Understanding lapidary work and rock tumbling through patient transformation: rough stone to polished surface, geological time compressed into human craft.
Mid-Century Modern & Stone Work
Mid-century designers understood raw materials. Harry Bertoia sculpted with welded metal. Isamu Noguchi carved stone into functional sculpture. Their work celebrated material honesty, letting the inherent qualities of metals, woods, and stones drive the design rather than disguising them. This philosophy extends naturally to lapidary work, where the stone itself determines what's possible.
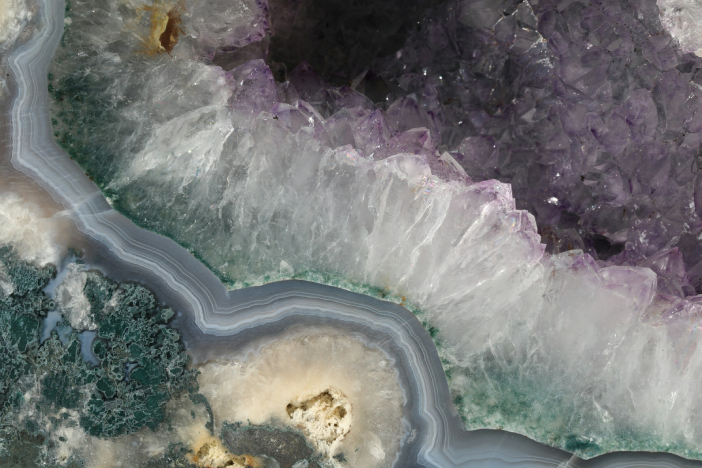
George Nakashima let wood grain and natural edges guide furniture forms. The same principle applies to working stone. You can't force a design onto agate that has internal fractures. The material speaks first. Mid-century makers listened to materials, working with their properties rather than against them. That approach produces more honest, more durable work.
Stone work connects to geological deep time in ways few crafts can. The agate cabochon you're polishing formed 50 million years ago. The skills you're learning to shape it go back thousands of years. There's something grounding about working with earth's oldest materials using techniques proven across millennia. It's meditative work. The rhythm of grinding, the progression through grits, watching cloudy surfaces slowly clear. You can't rush it. The stone teaches patience.
Lapidary Work: Cutting and Polishing
Lapidary transforms rough stone into polished cabochons, faceted gems, or decorative objects through controlled abrasion. The process removes material systematically using progressively finer grits until the surface becomes transparent to light, creating the polish we recognize as finished stone work.
Understanding Cabochon Making
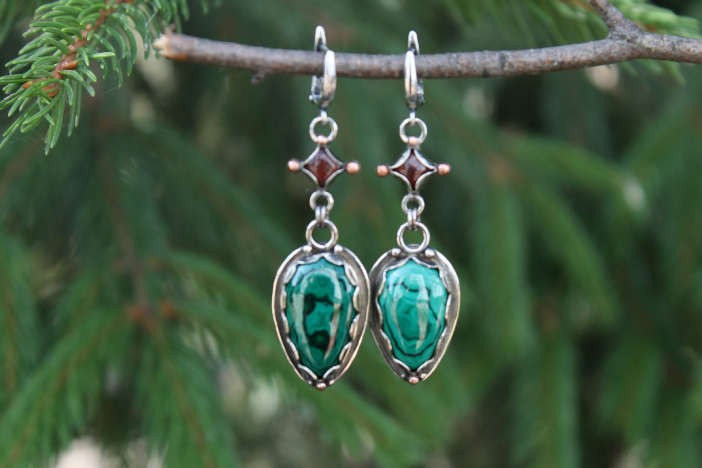
Cabochons are smooth, rounded stones without facets. This style suits opaque and translucent materials like agate, jasper, turquoise, and opal. The domed surface shows off internal patterns and color variations that faceting would obscure. Cabochon making represents the most accessible entry point to lapidary work, requiring less equipment than faceting and producing finished stones suitable for jewelry or display.
The process involves slabbing (cutting rough stone into workable pieces), shaping (grinding to rough dome form), and polishing (progressing through grits to achieve final surface). Each stage requires different equipment and techniques, but all follow the same fundamental principle: controlled material removal using abrasives of decreasing coarseness.
Essential Lapidary Equipment
Trim Saw (6-10")
$200-500
- Cuts rough stone into slabs
- Diamond blade in oil or water bath
- 6" adequate for most hobbyist work
- Requires dedicated space, messy operation
- Best for: initial rough preparation
Cabbing Machine
$400-1200
- Multiple wheels for shaping and polishing
- Typically 6-8" diameter wheels
- Coarse grinding, fine grinding, sanding, polishing
- Water-cooled operation prevents heat damage
- Best for: complete cabochon workflow
Combination Units
$800-2000
- Integrated saw and grinding wheels
- Space-efficient for home shops
- All operations in single machine
- Trade-off: less specialized than separate tools
- Best for: limited space, starting out
Grit Progression Science
Grit progression isn't arbitrary tradition. It's applied materials science. Each grit removes scratches left by the previous grit. Skip a grit, and coarse scratches remain beneath finer grinding, emerging as visible defects in final polish. The progression typically runs: 80 grit (coarse shaping), 220 grit (fine shaping), 600 grit (pre-polish), 1200-3000 grit (polishing), finishing with cerium oxide or similar polishing compound.
Each grit must completely remove scratches from the previous stage before moving to the next finer grit. This takes time. Rushing through grits produces stones that never achieve proper polish, no matter how long you work the final stages. The scratches are too deep for fine grits to remove. Starting over from coarser grit becomes necessary.
Material Selection for Lapidary
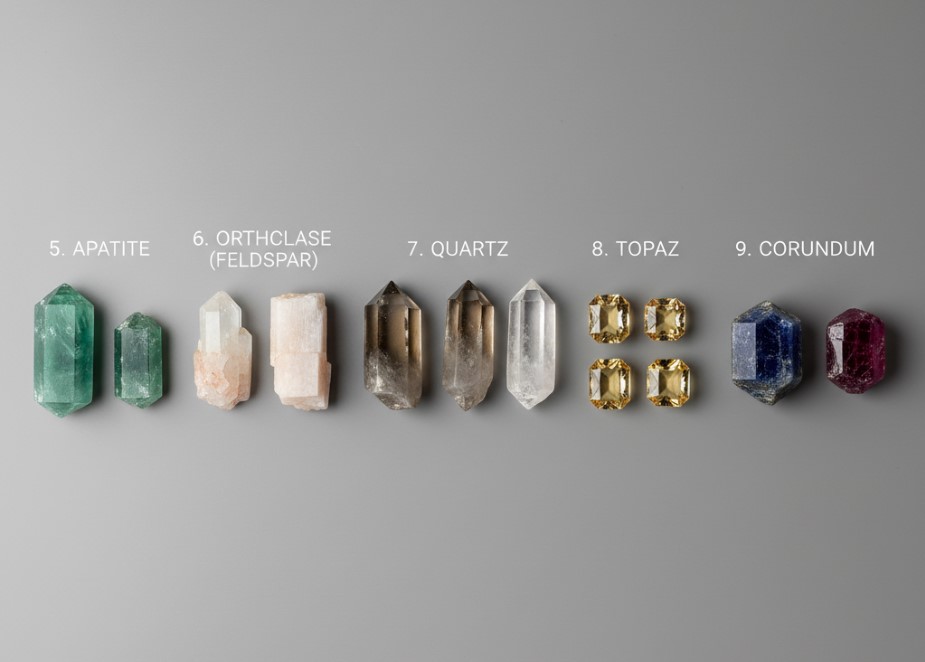
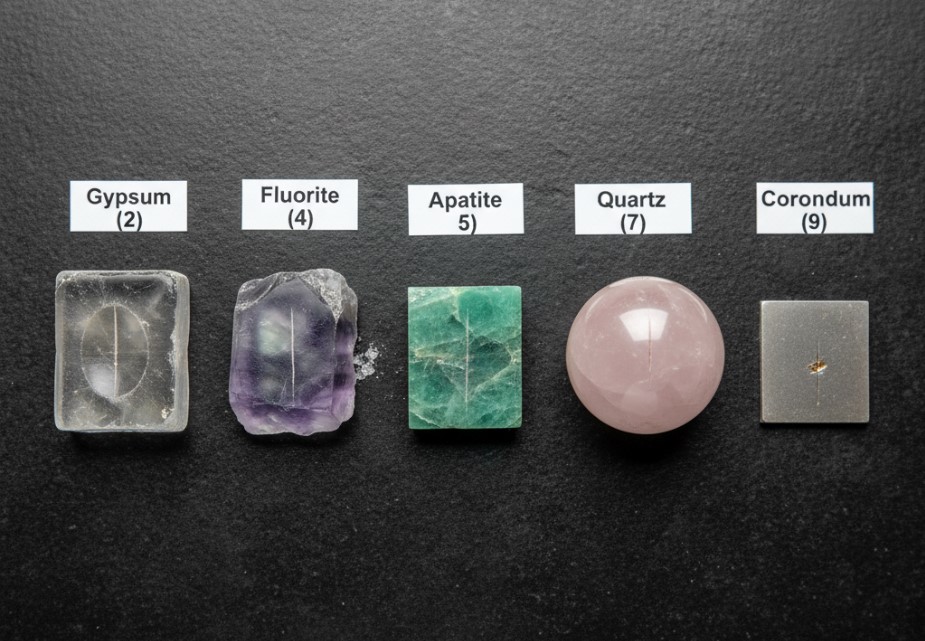
Not all stones work equally well for cabochons. Hardness matters most. Mohs scale 5-7 (agate, jasper, obsidian, quartz varieties) provide the best beginner experiences. They're hard enough to take good polish but soft enough to work without excessive time or equipment wear. Materials below 5 (turquoise, malachite, calcite) scratch too easily and require different techniques. Materials above 7 (sapphire, ruby, topaz) demand significantly more time and equipment.
Internal structure matters as much as hardness. Stones with fractures, inclusions, or layering require careful orientation and gentle handling. Some spectacular-looking rough produces disappointing finished stones because internal flaws only become apparent during grinding. Experience teaches which rough is worth the time investment.
Common Problems and Solutions
Heat damage from insufficient water cooling creates whitish surfaces that won't polish. The heat changes stone chemistry permanently in a thin surface layer. Prevention requires constant water flow and avoiding prolonged pressure in one spot. If heat damage occurs, you must grind back to unaffected material and restart the grit progression.
Flat spots on domed cabochons result from uneven grinding pressure or incomplete rotation during shaping. The stone must move constantly across the wheel face to maintain even curvature. Beginners tend to hold the stone too firmly in one position, creating faceted surfaces instead of smooth domes. Light pressure and constant movement prevent this.
Undercutting (concave bottom edges) happens when grinding pressure concentrates at the cabochon edge. This weakens the stone and creates setting problems in jewelry. Maintain even pressure distribution and work the entire stone surface, not just edges.
Space and Cost Reality
Lapidary work requires dedicated space. Equipment doesn't fold away. Saws and cabbing machines need sturdy mounting and access to water. Count on 4-6 feet of workbench space minimum, with drainage for waste water. The work is messy. Stone slurry goes everywhere despite best efforts. Plan accordingly.
Initial investment runs $600-1500 for functional beginner setup (saw, basic cabbing machine, initial grit and polish supplies, rough stone). Ongoing costs include grit replacement ($50-100 annually for hobbyist use), polishing compounds, and rough material. Quality rough stone costs $5-50 per pound depending on material and source.
Rock Tumbling: Patience Mechanized
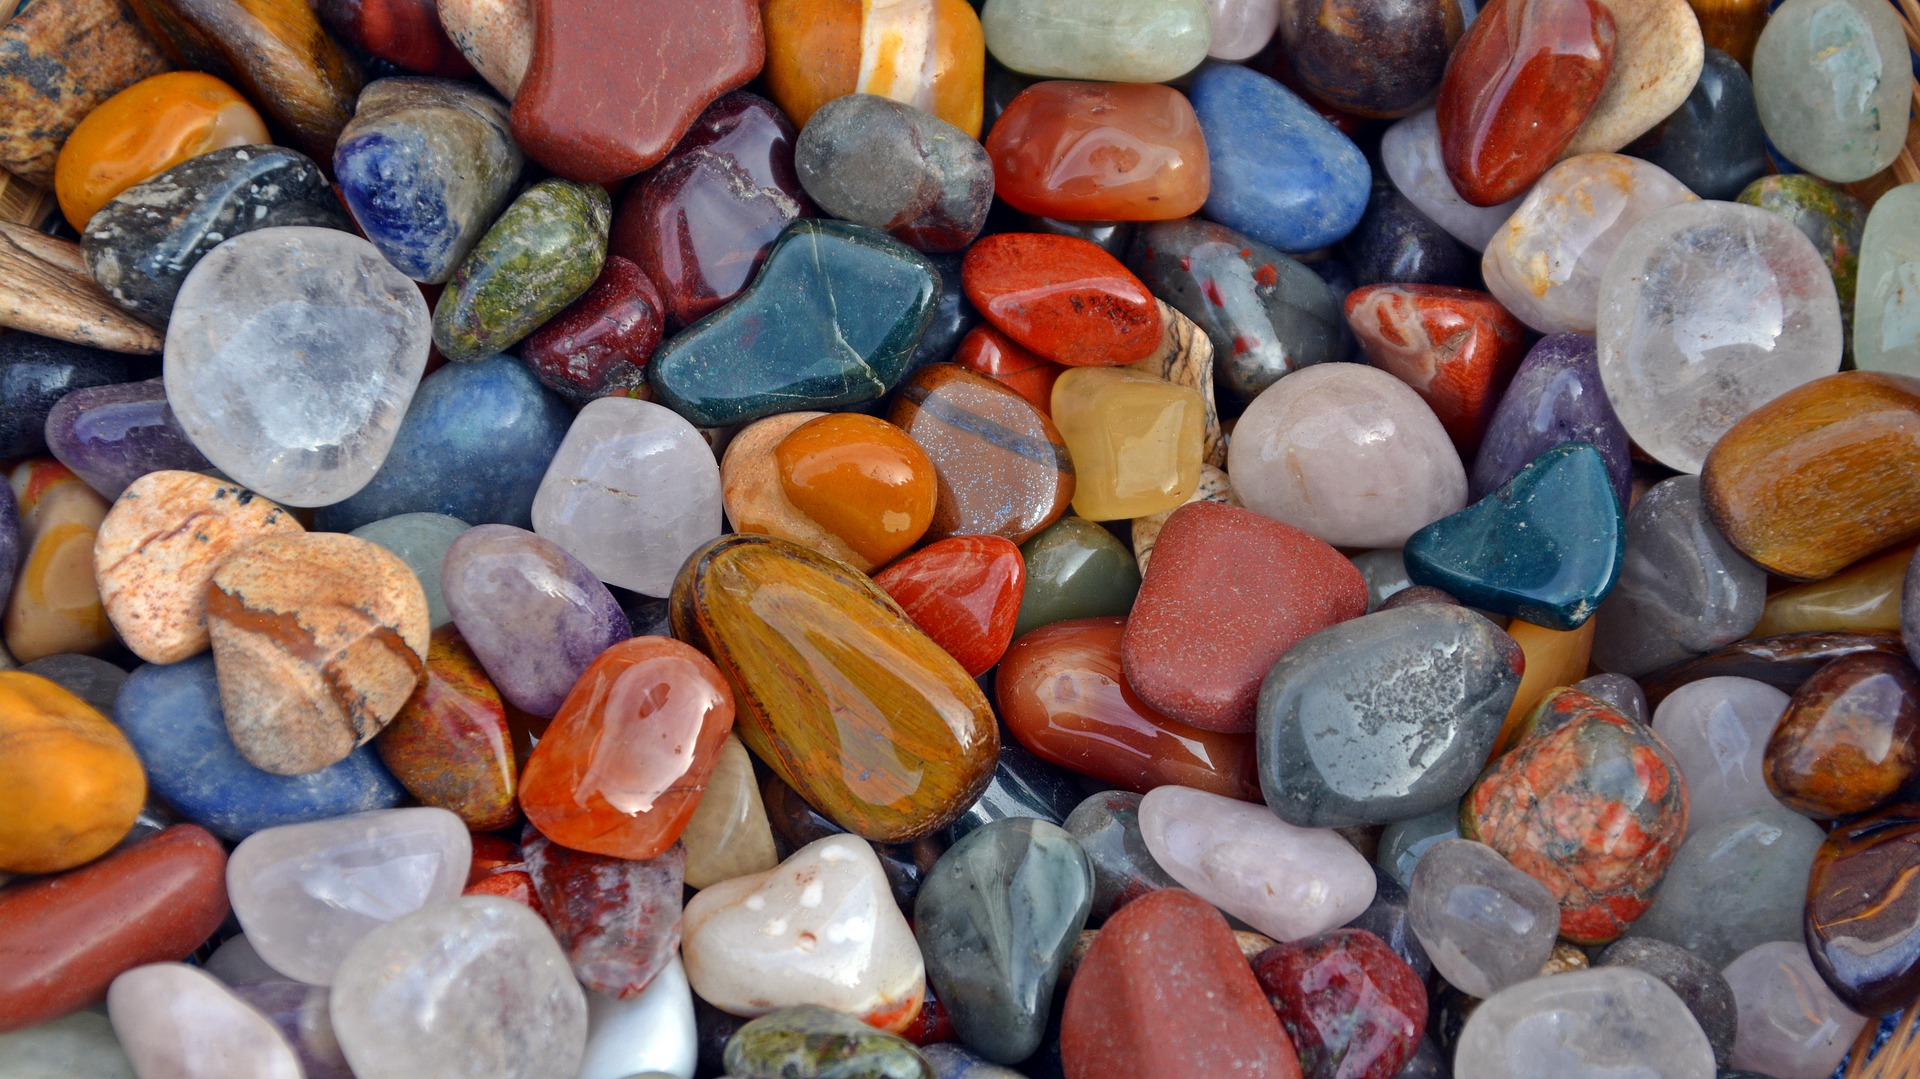
Rock tumbling transforms rough stones into smooth, polished pieces through continuous abrasion in rotating barrels. The process mimics stream polishing but compresses thousands of years of natural action into weeks. Unlike lapidary cabbing, tumbling works on bulk quantities, making it ideal for producing multiple polished stones or for hobbyists wanting results without learning manual shaping skills.
How Tumbling Works
A tumbler is simply a barrel that rotates continuously, keeping stones in constant motion with water and abrasive grit. The rotation causes stones to rub against each other, grinding away rough surfaces. Progress is slow but automatic. Load the barrel, add appropriate grit, start the tumbler, and wait. The machine runs 24 hours daily for the entire process.
Tumbling follows the same grit progression as hand polishing but uses loose grit rather than grinding wheels. Stones progress through coarse (60/90 grit), medium (120/220 grit), fine (500/600 grit), and polish (1200-3000 grit or specialized polish) stages. Each stage removes the scratches from the previous stage until surfaces become reflective.
Tumbler Selection
| Type | Capacity | Time Per Stage | Cost | Best For |
|---|---|---|---|---|
| Rotary (3 lb) | 3 lbs rough stone | 7-10 days per stage | $60-150 | Beginners, small batches |
| Rotary (6-12 lb) | 6-12 lbs rough stone | 7-10 days per stage | $150-400 | Serious hobbyists, multiple batches |
| Vibratory | 5-18 lbs rough stone | 3-5 days per stage | $200-500 | Faster results, flatter stones |
The Four-Stage Process
Stage 1: Coarse Grind
60/90 grit silicon carbide removes rough surfaces, knocks off sharp edges, and shapes stones toward their final form. This stage removes the most material and takes the longest. Run until all stones have smooth, rounded surfaces with no sharp edges or flat spots. Typically 7-10 days for rocks in the Mohs 6-7 range.
Stage 2: Medium Grind
120/220 grit removes coarse scratches and continues smoothing. Stones should develop a matte surface with no visible scratches from stage 1. This stage often goes faster than coarse grinding since you're removing less material. Typically 5-7 days.
Stage 3: Fine Grind
500/600 grit creates the pre-polish surface. Stones should have a smooth, matte finish that feels silky. Any scratches visible at this stage will show in final polish. Typically 5-7 days. This stage determines final polish quality.
Stage 4: Polish
Aluminum oxide, cerium oxide, or tin oxide creates the final gloss. This isn't removing material so much as burnishing the surface. Polish quality depends entirely on how well you completed previous stages. No amount of polish will fix insufficient fine grinding. Typically 5-7 days.
Material Compatibility
Tumbling works best on materials of similar hardness. Mix soft and hard stones in one barrel, and the soft stones wear away to nothing while the hard stones barely change. Quartz varieties (agate, jasper, aventurine) work excellently together since they all cluster around Mohs 7. Obsidian and similar volcanic glasses tumble well but separately from harder materials.
Stone size matters less than hardness matching. Mixing large and small stones of the same hardness works fine. The small stones help polish crevices in larger stones. But avoid extreme size differences (pea-sized stones with golf ball stones) as the small stones just wear away too quickly to be useful.
Time Requirements by Material
| Material | Mohs Hardness | Typical Cycle Time | Notes |
|---|---|---|---|
| Obsidian | 5-5.5 | 2-3 weeks | Fast polishing, brittle |
| Agate, Jasper | 6.5-7 | 4-5 weeks | Standard timing, excellent results |
| Quartz | 7 | 4-6 weeks | Ideal tumbling stone |
| Beryl | 7.5-8 | 6-8 weeks | Very slow, requires patience |
Common Tumbling Problems
Barrel leaks create mess and stop progress. Inspect lid seals regularly and replace worn seals immediately. A leaking barrel loses water and grit, leaving stones grinding dry, which damages both stones and barrel.
Insufficient cleaning between stages carries coarse grit into finer stages, causing scratches that won't polish out. Every stone must be thoroughly cleaned after each stage. Rinse until water runs completely clear. Clean the barrel interior equally carefully. One grain of coarse grit in the polish stage ruins an entire batch.
Overloading barrels prevents proper tumbling action. Stones need room to move and cascade over each other. Fill barrels 60-70% full maximum. Less is better than more. Insufficient grit or water also prevents proper grinding. Follow manufacturer ratios precisely.
Space and Noise Considerations
Tumblers run continuously, creating constant low-level noise. Rotary tumblers sound like rolling gravel 24 hours daily for weeks. This matters more than most beginners expect. Basements, garages, or outbuildings work well. Running a tumbler in living spaces gets old fast, even with "quiet" models.
Initial investment runs $100-400 for tumbler, plus $50-80 for grit, polish, and initial rough stone. Ongoing costs include electricity (tumblers run constantly for weeks), grit replacement, and rough material. Expect $30-50 per batch in supplies after the initial setup.
Related Guides
Grit Progression Science: Why Steps Matter
Understanding the physics of abrasion and why skipping grits ruins your polish.
Cutting Through the Options: Lapidary Saws
Learn how to get the right equipment for cutting rough rock into slabs and creating cabochons.
Rock Tumblers Worth Running for Weeks
A complete guide to rock tumblers and getting professional-grade polished stones.

Rock Tumbling Grit Progression Explained
The four-stage process that transforms rough stone into polished gems through progressive abrasion.
What Rocks Can Be Tumbled
The Mohs hardness scale determines rock tumbling success more than any other factor.
Hardness Testing in Practice
What actually happens when you test unknown stones with files, knives, and other tools.